5. Running the Model
We are now done with modeling our simple dipole. Go to the File menu and perform a "Save Model..." to save your hard work. If you are overwriting the original file (that had the empty model, remember?), cocoaNEC will warn you. Go ahead and overwrite the empty model.
It is now time to look at how well this dipole might perform. Click on the Run button at the bottom right of the spreadsheet window.
When you click Run, cocoaNEC will create the NEC-2 input "deck" for the model that you have entered. The deck is sent to the NEC-2 engine for processing. cocoaNEC then extracts the results from the output from NEC-2 and opens the Output Window to display them:
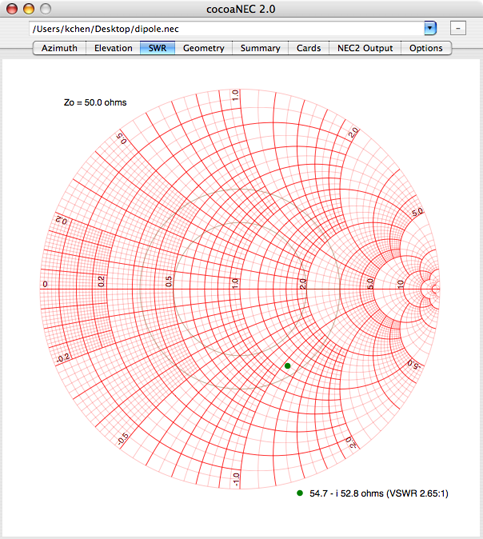
You can see right away from the SWR view of the Output Window that the dipole is a bit short of being resonant -- notice the negative reactance, indicating a capacitive feed point.
The two gray constant VSWR circles are drawn for VSWR of 2.0:1 and 3.0:1. Notice that the reference transmission line impedance used in the Smith Chart is 50 ohms. You can change this to any other (real) value by going to the output Options panel (the last tab in the Output Window that is shown above).
You can change the reference resistance (the center of the Smith Chart) for determining the SWR by changing the value for the Reference Zo field in the Options tab view (the last tab in the Output window).
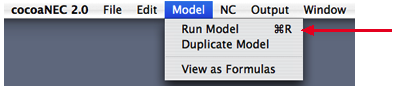
You can also run the active model by selecting Run Model (command-R) in the Model Menu instead of using the Run button. This allows you to run a model while having a sheet (e.g., the Variable sheet) open for making quick changes. If there is more than one model window open, the active model is the model whose window is active.
Next: Modifying the Model...